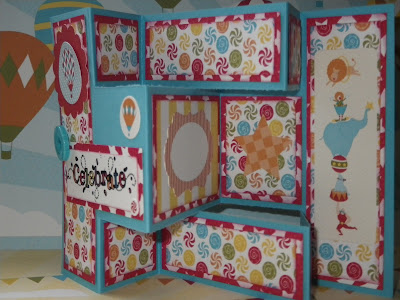
Well I' supposed to be at work but received a call at lunch from daycare, and Hannah is sick with a fever of 102...so it was Tylenol, water, and Ariel, so while the house is quiet I thought I would put up a quick post. This is the card I mentioned in an earlier post...I'm just not too crazy about it. I LOVE the paper but think it might be just a little too busy all together for the shutter card...what do you think? My thought is the tri shutter card might be best left to more elegant types of paper or vintage.
Anyways, as promised (and late!) here are the dimensions to make these super cool cards!
Start off with a piece of 12x12 and cut to 5 1/2. Then take the piece of 5 1/2 x12 and place it longways on your paper trimmer or simply scored, and score at 2, 4, 8, 10. Then flip the piece in your trimmer so now it will be the length of your trimmer and measure in 1 1/2"...take your blade and start at the 2" mark and cut to the 10" mark (don't go past!). Now flip the paper and do the same to the other edge (so measure in 1 1/2" again and trim from the 2" mark to the 10" mark. Now time to decorate!
If you're using cardstock and DSP here are the measurements for the pieces you will need to layer the paper:
1 pc of 2 1/4 x 3 3/4 1pc of 2 x 3 1/2
2 pcs of 1 1/4 x 3 3/4 2pcs of 1 x 3 1/2
4 pcs of 1 3/4 x 1 1/4 4pcs of 1 1/2 x 1
1 pc of 2 1/4 x 2 1 pc of 2 x 1 3/4
That's it! So if you want to leave the cardstock layer out, you can just use the Cardstock dimensions with your DSP or to leave a wider edge use the DSP measurements.
THanks for stopping by and have a super day!
Steph


No comments:
Post a Comment